

BRANDING + BUSINESS
INTERIOR DESIGN
PHOTOGRAPHY
STYLE & BEAUTY
TRAVEL
Want me to read this to you? Press Play!
The primary bathroom in my Tulsa, Oklahoma home (now sold) had always been a space I disliked. I mean, most people would probably say there was nothing wrong with it. But to me, the bathroom was more of a mish-mash of mainstream popular-ish elements that really weren’t my style or color preference.
From the original river-rock shower floor tile that I despised (so uncomfortable to stand on), to the faux Moroccan floor tile across the bathroom floor and up the tub surround wall, to the original rich taupe walls that I immediately painted white upon moving in, and the yellowy white original cabinet color – it was the space in the home that needed the most work to take it from builder basic to beautiful.
So in June 2020, almost 3-years after purchasing the house sight-unseen (apart from online photos and a virtual walkthrough with an agent)… and needing a weekend pandemic project that was more challenging than cooking banana bread or sourdough bread or learning the “I’m a Savage” TikTok dance lol…
I decided it was time for…
A cottage inspired bathroom renovation project that would challenge any DIY skills I thought I had!
Had I renovated anything on my own before? Absolutely not!
Was I armed with a plan, buckets of confidence and oodles of research? You bet!
Was I putting off a vibe of “I’ve got this” on the outside… but secretly pooping my yoga pants? OMGGGG, heck yes!!!
BEFORE: what was I working with?
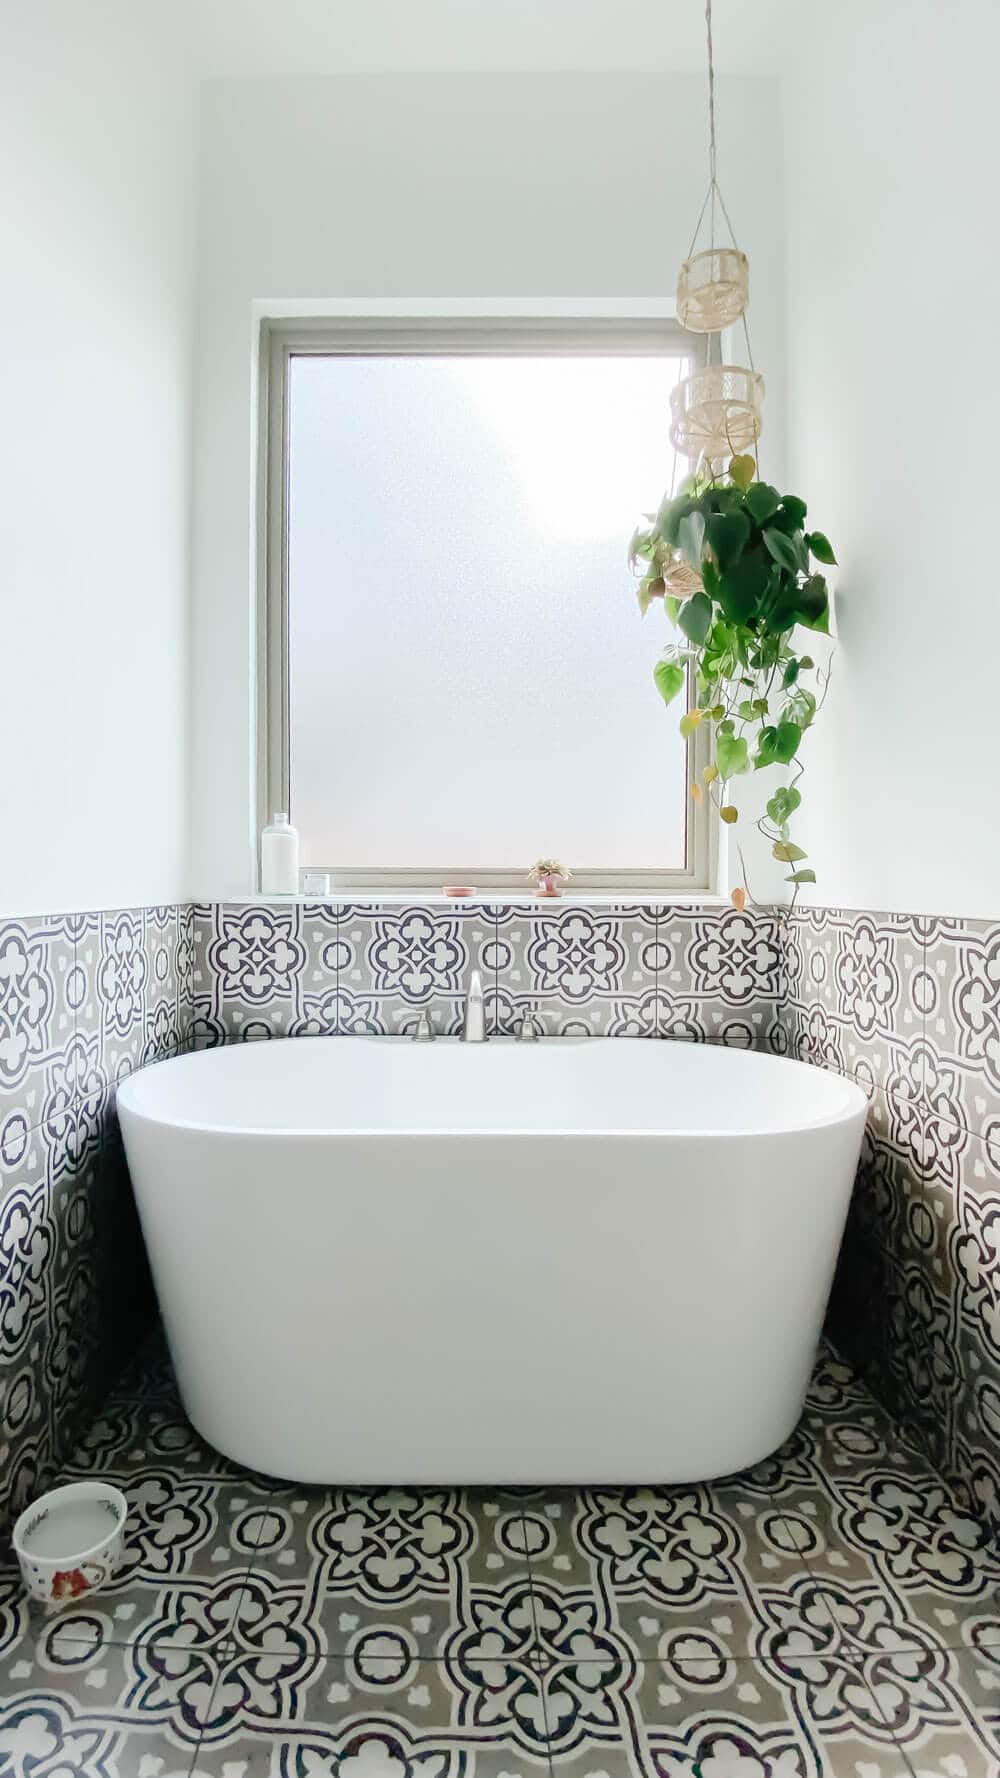
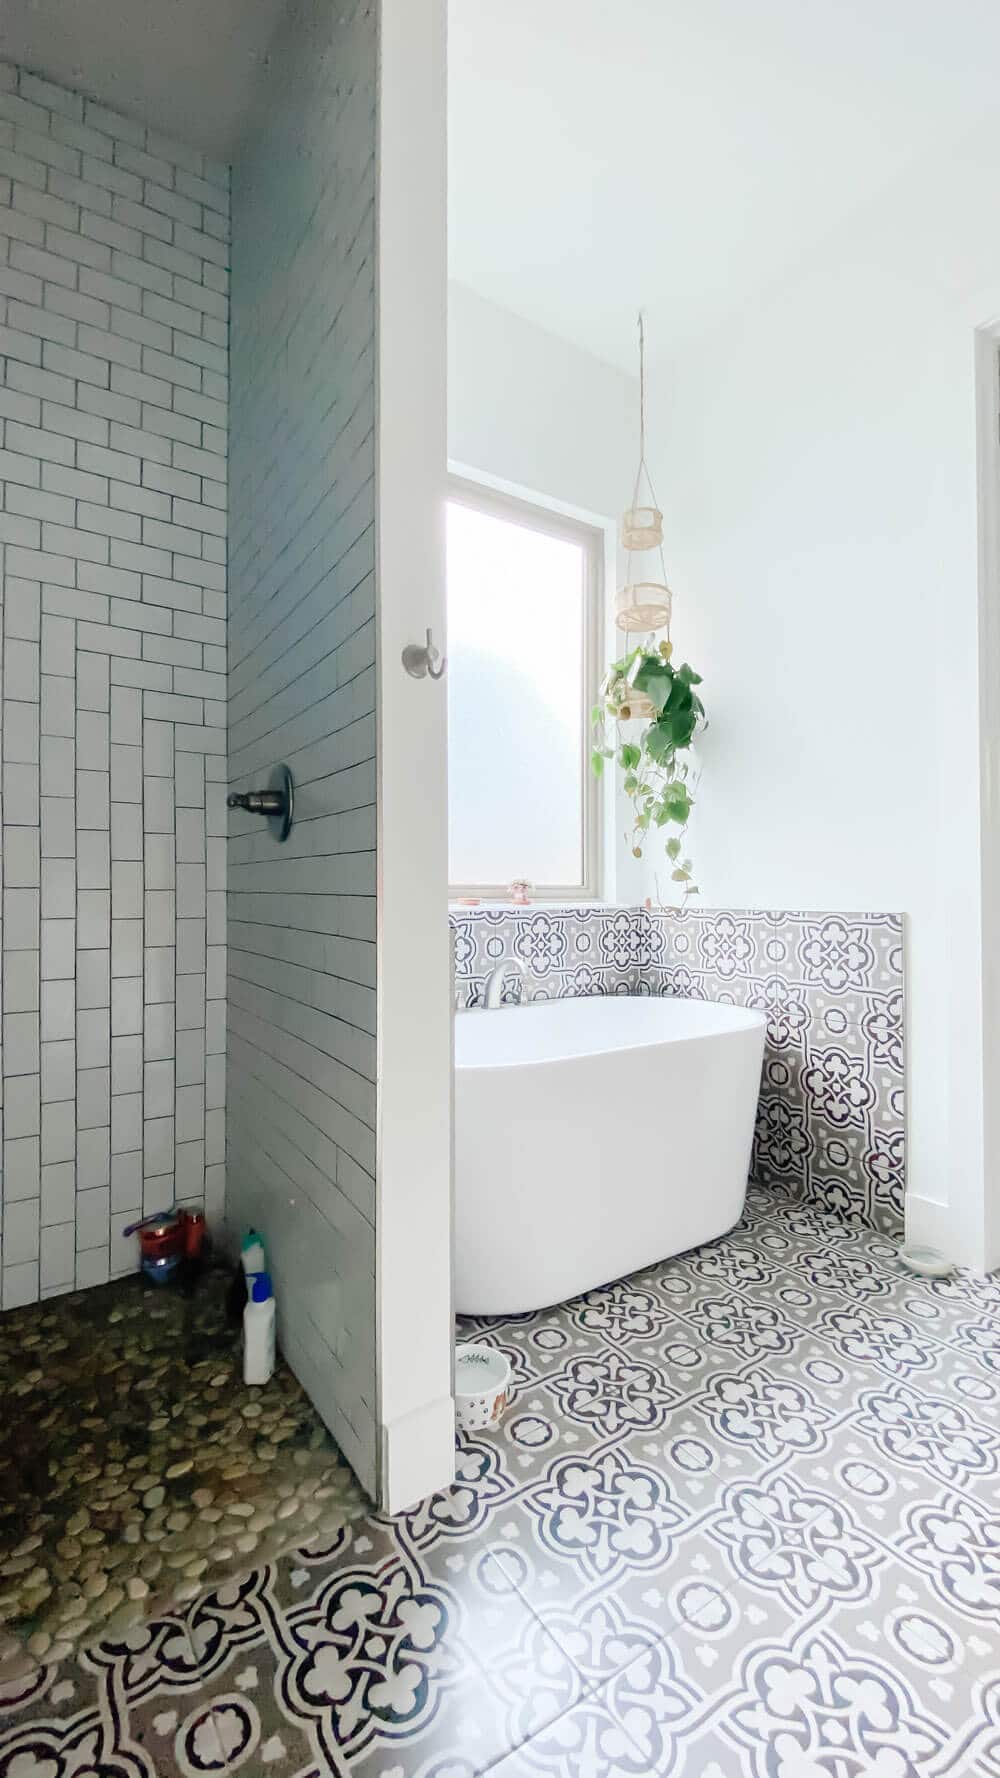
Below are some quick snaps of the primary bathroom prior to work beginning.
The house was brand new when it was purchased – so ripping out the bathroom felt a little excessive. The walls were a rich taupe and the bathroom cabinet was a soft buttery white which I felt clashed with the cool tone Carrera marble countertop.
As a quick and temporary solution to make the primary bathroom feel a little more ‘current’, I had the walls painted with Sherwin Williams Pure White and the cabinets Bright White.
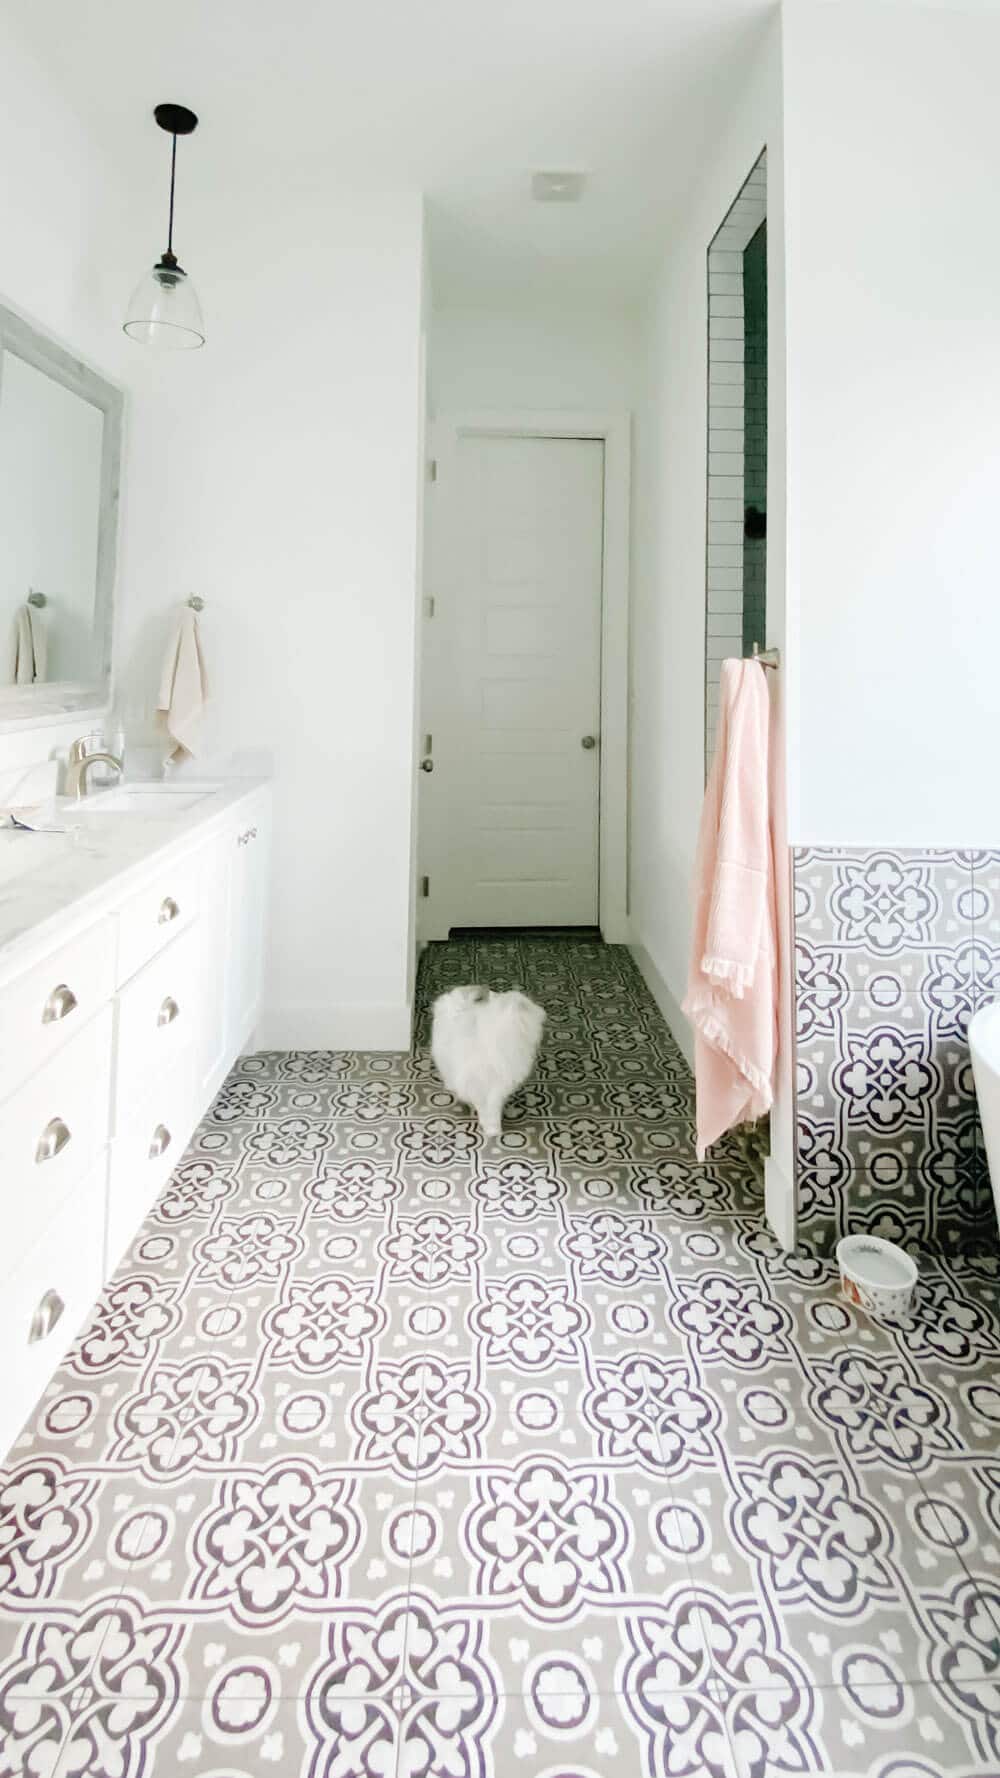
For the next 3-years, this is how the bathroom looked:

Bathroom prior to painting in 2017.
Bathroom with white walls and white cabinets – my starting point for this bathroom project.
WHAT DID I WANT TO FIX IN THE BATHROOM?
- Remove the river rock from the shower floor.
There were a few reasons I wasn’t a fan of the river rock – functionally, it was super uncomfortable to stand on (it had deep grooves between each of the rocks). The drainage wasn’t great from one corner of the shower – Herbie & Georgie would use it as a paw paddling pool!Aesthetically, I really disliked the main bathroom floor tile being different from the shower floor – there was no door, threshold, or transition so the flow felt off. That brings me to the second item that I wanted to change…
- Remove the 12×12 large pattern tile from the floor and tub surround.
I know, I know, I might be crazy because this style of tile was popular… but it really wasn’t my style and I totally disliked the brown and grey color. Plus, it felt like lot going up the wall wrapping around the tub. - Add shelves to the shower.
For 3-years all the shower-time products were higgelty-piggelty on the shower floor because there was no niche or shelves.
WHAT DID I WANT TO ENHANCE?
In one word… PERSONALITY!
If 2020 did anything, it made me realize just how O-V-E-R white I was, aswell as styling homes for resale aka SAFE!
I was craving cozy, homey, grounding, personality-filled spaces in my home – wallpaper, texture, mixed finishes, ornate mirrors etc.
I’ve played design in my own home ridiculously safe considering I’m a designer – mostly because within a few short years, typically the house would be sold due to a work-related move… so I wanted it to appeal to a mass market.
By June 2020 I was done with not having a space that spoke to my design heart – especially given that it was the space I started my day.
It was never my intention to leave this space feeling sparse – I just hadn’t given the primary bathroom priority over other areas of the home… or my work schedule!
PLOT TWIST: not long after I finished this cottage-inspired bathroom renovation, the Tulsa house was sold and I moved to Washington State! Lol! The feedback from the selling agent was new owners loved the bathroom.
The COTTAGE INSPIRED BATHROOM RENOVATION plan
What I really wanted was a bathroom that was cozy and had a modern cottage vibe – organic grandmillennial is the style.
And because I wasn’t moving any walls or relocating any plumbing, in the beginning, I was calling the renovation a “mini-makeover”… well let me tell you, there was nothing ‘mini’ about this makeover for this first time DIYer.
I was originally inspired by some wallpaper from Sezane (one of my favorite sustainable fashion boutiques) that was off-white with a rich green floral pattern. I had to have it – so the rest of the design started forming around that element.
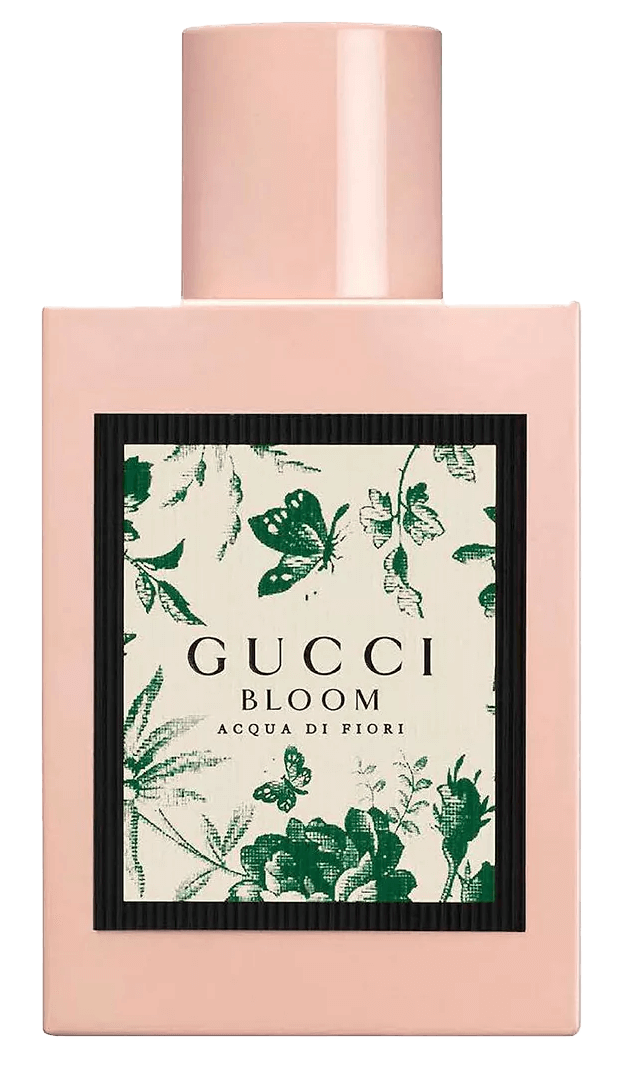
Then while I was back-and-forthing between paint colors, I found the most gorgeous bottle of Gucci perfume that fit my vision and personality so perfectly.
Below is a sketch of my vision and the perfume that made me want to live in a space that emulated the way the design and fragrance made me feel:
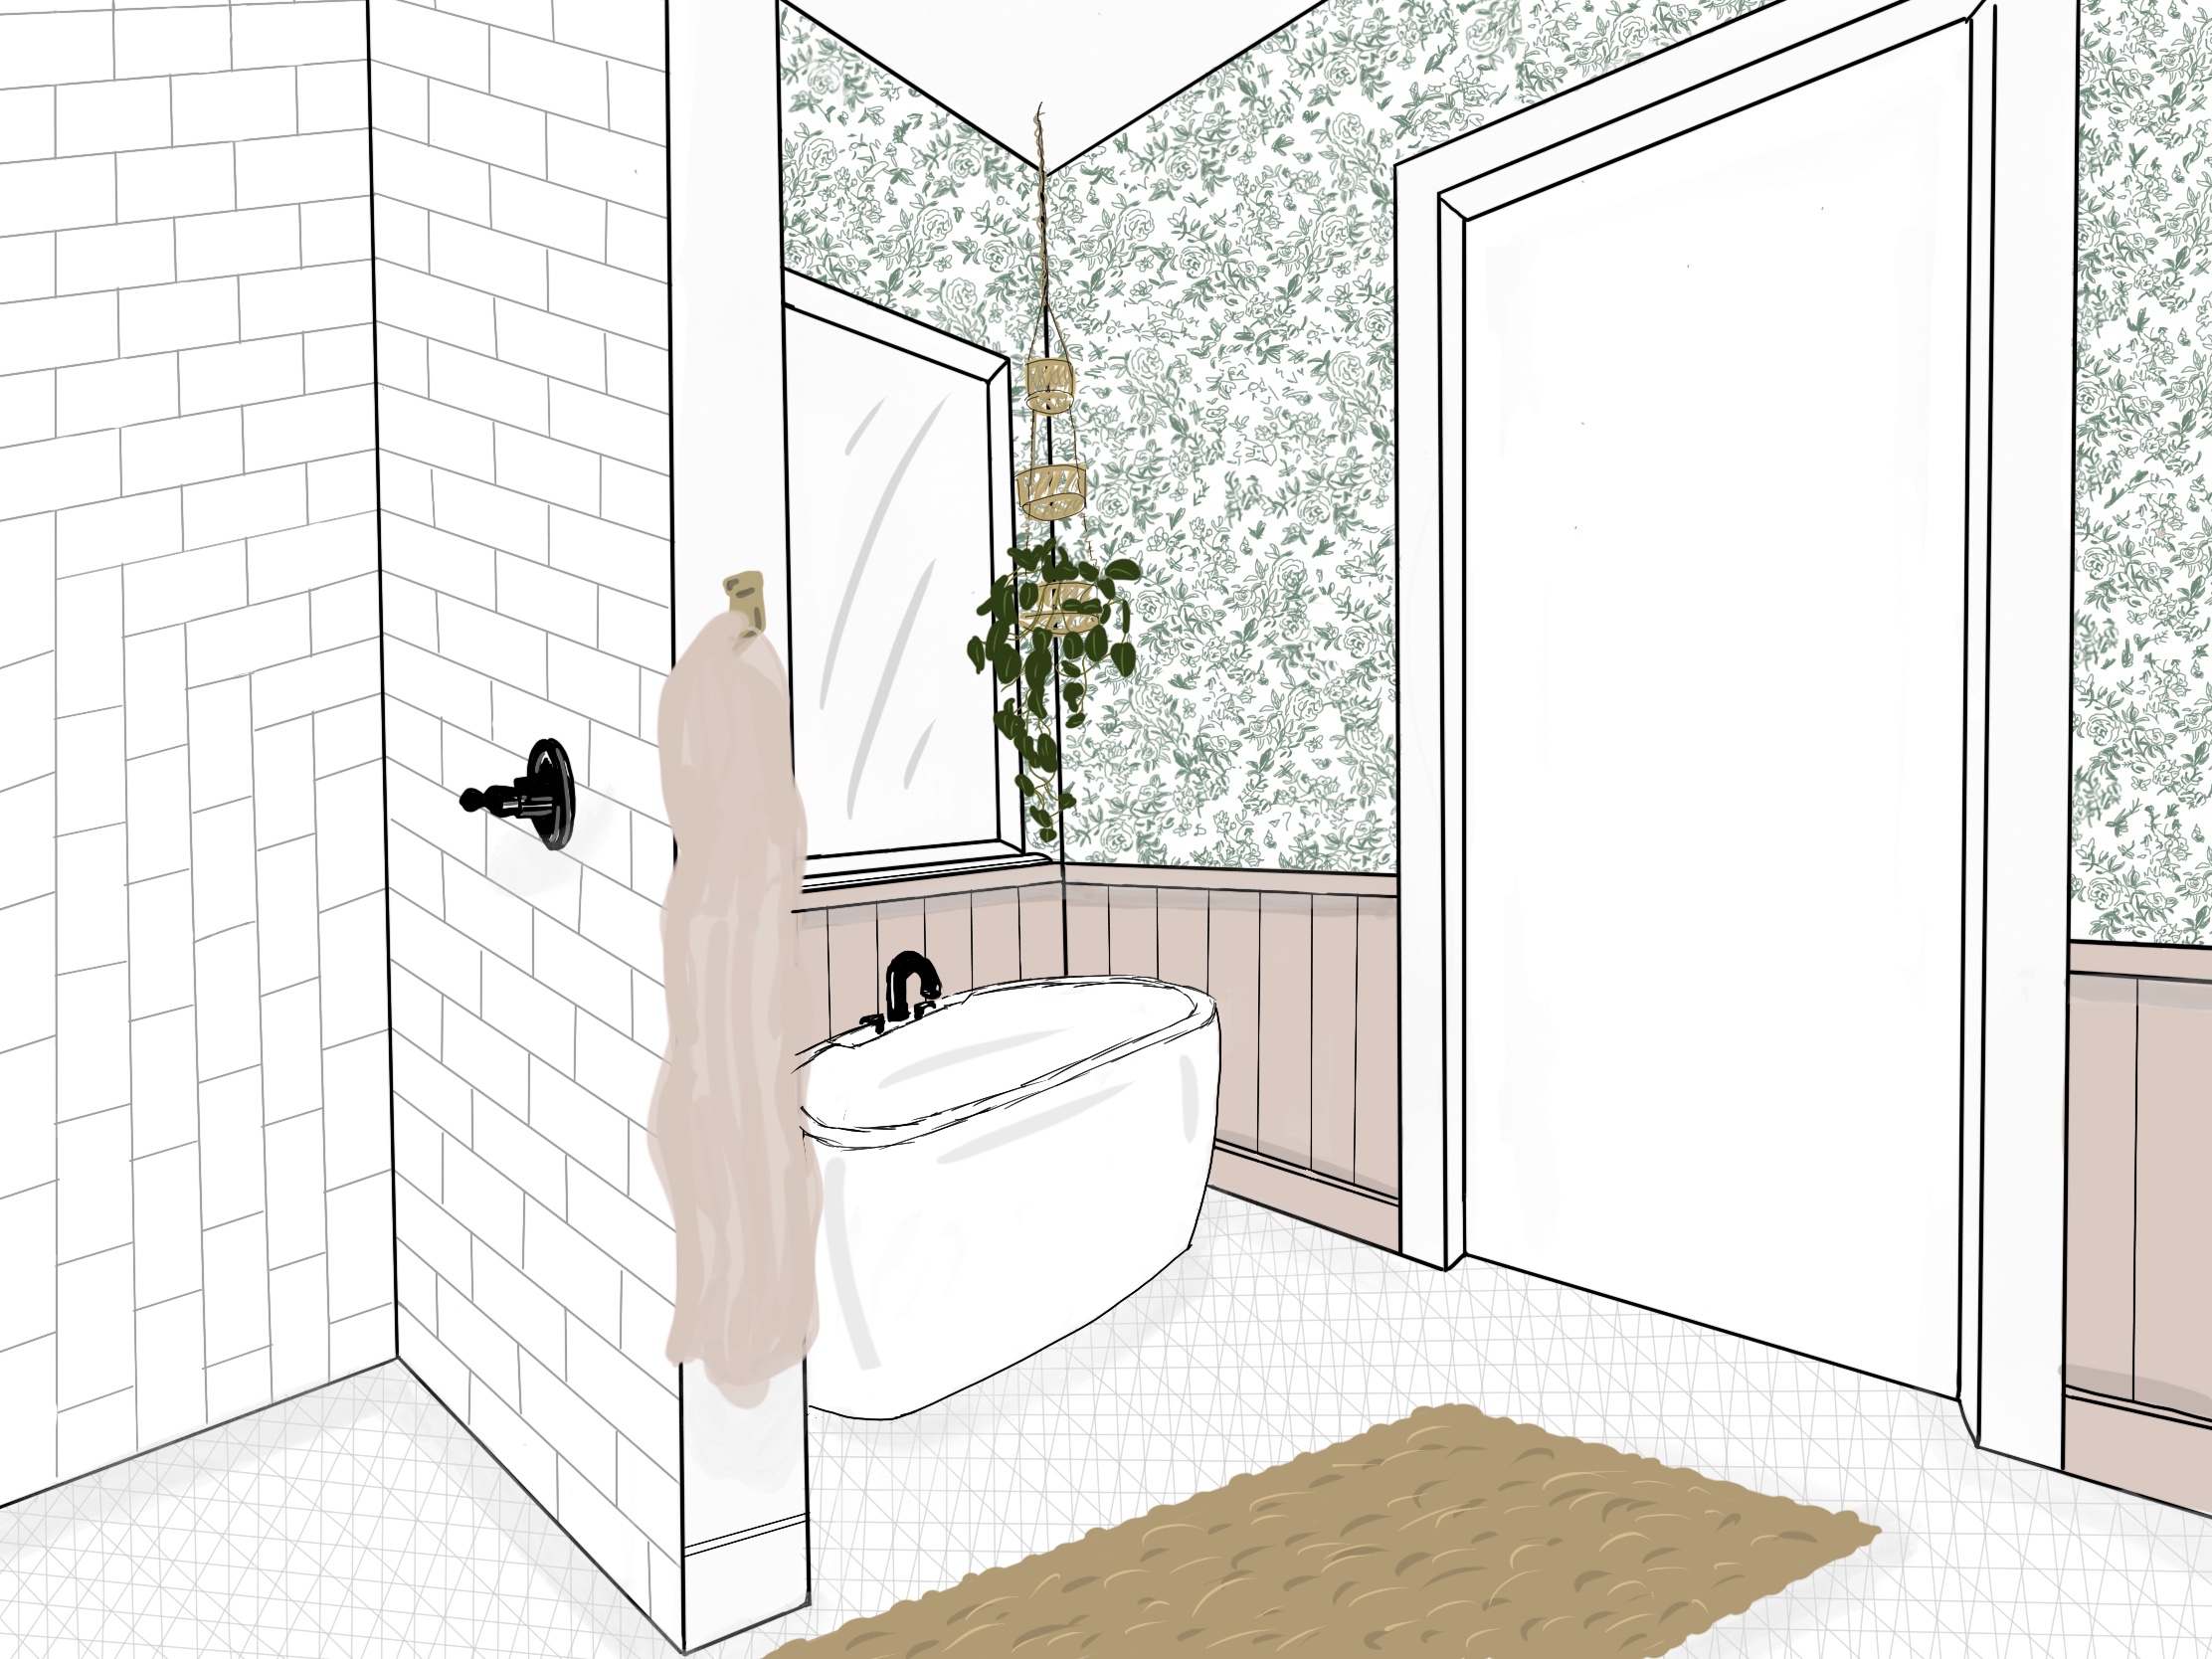
IN ORDER TO MAKE MY COTTAGE-INSPIRED BATHROOM
VISION A REALITY, HERE WAS MY DIY PUNCH LIST:
- Remove the old floor tile from the bathroom and toilet, shower, and walls of the tub surround:
I hired a chipping hammer over 2-days and took great pleasure at breaking that horrendous tile up… although the river rock on the shower floor was the bain of my existence – I couldn’t get the chipping hammer into some areas so I had to hand chisel those pieces out. I left the tile on the shower walls because I didn’t see any real point in messing with that. - Re-gyprock the wall surrounding the tub:
After I took out the tile from the walls surrounding the tub, I had to replace the old damaged drywall. So I hung new drywall, as well as mud and tape the seams. - Skim coat all the walls where I planned to hang wallpaper + apply primer paint:
The walls were covered with an orange peel texture which needed to be smoothed in order for the wallpaper too look beautiful and bump-free. To make sure that the wallpaper glue adhered to the wall properly, I painted primer where the fresh skim coating was done. - Re-slope the shower floor:
The original river rock tile required a steeper drain grade than the 2″ x 2″ mosaic hex tile I was replacing it with. This meant that the shower floor needed to be re-graded so that the slope wasn’t so intense.The knock-on effect of having to regrade the shower floor… the shower drain had to be replaced so that the drain height could be raised an inch or so… this was the only time I hired a task out. I had a plumber take care of the drain height, and remove/ reinstall the toilet + freestanding tub.
This was also the only time I injured myself – I gave myself a chemical burn on both hands while re-mudding the shower floor and ended up at urgent care… despite wearing gloves. That was also the day that I learned about impermeable gloves! hahaha
Re-tile the shower, bathroom, and toilet floor:
I’ve tiled one time before but nothing to this scale. This task took the biggest hit on my timeline… and my knees hahah. I installed 2” x 2″ mosaic hex tile that came on a 12” x 12” mesh sheets.One of the things I noticed during my research is that some DIYers (and the odd dodgy tiler) had a tough time concealing the sheet join lines. One way to combat this issue was to stagger where each sheet was joined.
But my old perfectionism tendencies kicked in… and this time I was here for it.
I noticed inconsistencies in the spacing of the tiles on the mesh sheet. This was going to cause a problem because the next sheet wouldn’t fit with the same spacing.
So… I did something that everyone thinks I was absolutely nuts for doing… I took all the 2” tiles off the mesh backing and painstakingly laid them one-at-a-time! It felt like the task that never ended but it paid off… no unsightly join lines.
Since then, I spoke with a professional tiler about what he does in this situation, he said just remove the tiles that were in question. It was usually the ones on the outside edge… I have no idea why I didn’t think about that! Welp, I guess I know for next time. LOL
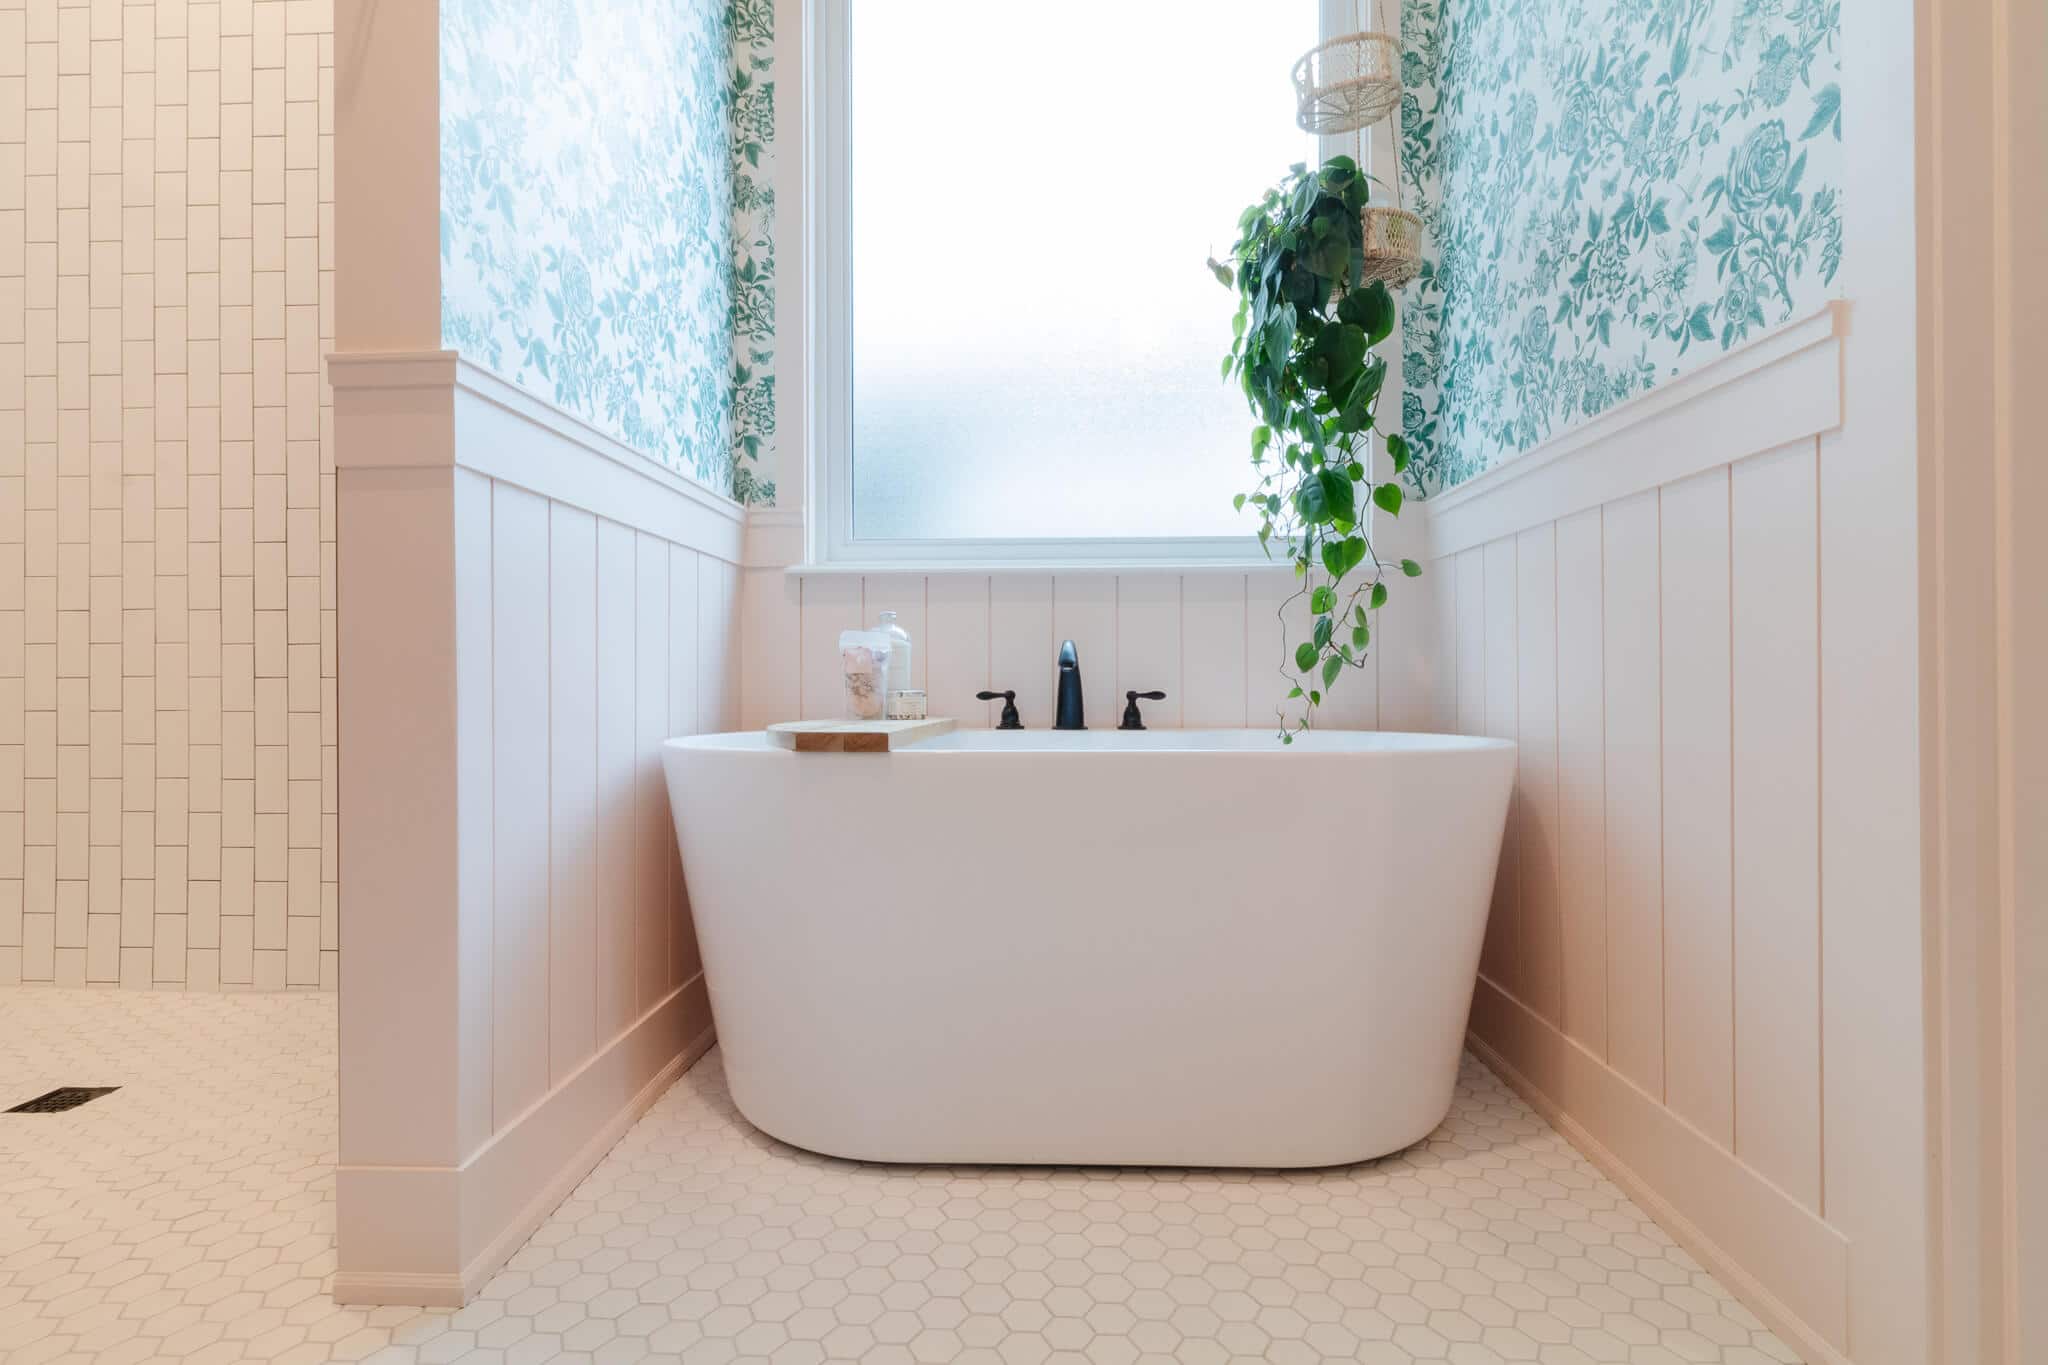
Install vertical shiplap + cap the 1/3 walls around the tub and either side of the vanity with a decorative trim, and paint a soft pink:
I’m super over the traditional shiplap look… but wanted to add more character and texture to the walls without it feeling “farmhouse”. So, I decided to pull on my Australian & English heritage – gorgeous old Queenslander home always have vertical shiplap and so do many English cottages… so that’s the route I took.Repaint the white cabinets with a faux wood finish and swap out the hardware:
This was another time-consuming element of the entire reno – this tested me to no end. I almost gave up trying to get the look I was going for – an antique-style cabinet without looking shabby chic (not my style).At one point after trying to correct the technique on the cabinet doors twice, I painted one door a dark and moody forest green… but hated it. So I sanded the door back and started over.
I’m so glad I persisted (or maybe was stubborn to my vision lol) because I loved how the final cabinets turned out. Oh, and the selling agents that were interviewed thought a professional had done the job!!! Not bad for my first time.
Add trim to the window:
The primary bath was one of the only windows without trim around it. So I wanted to add trim to match the windows in the rest of the house.Install wallpaper:
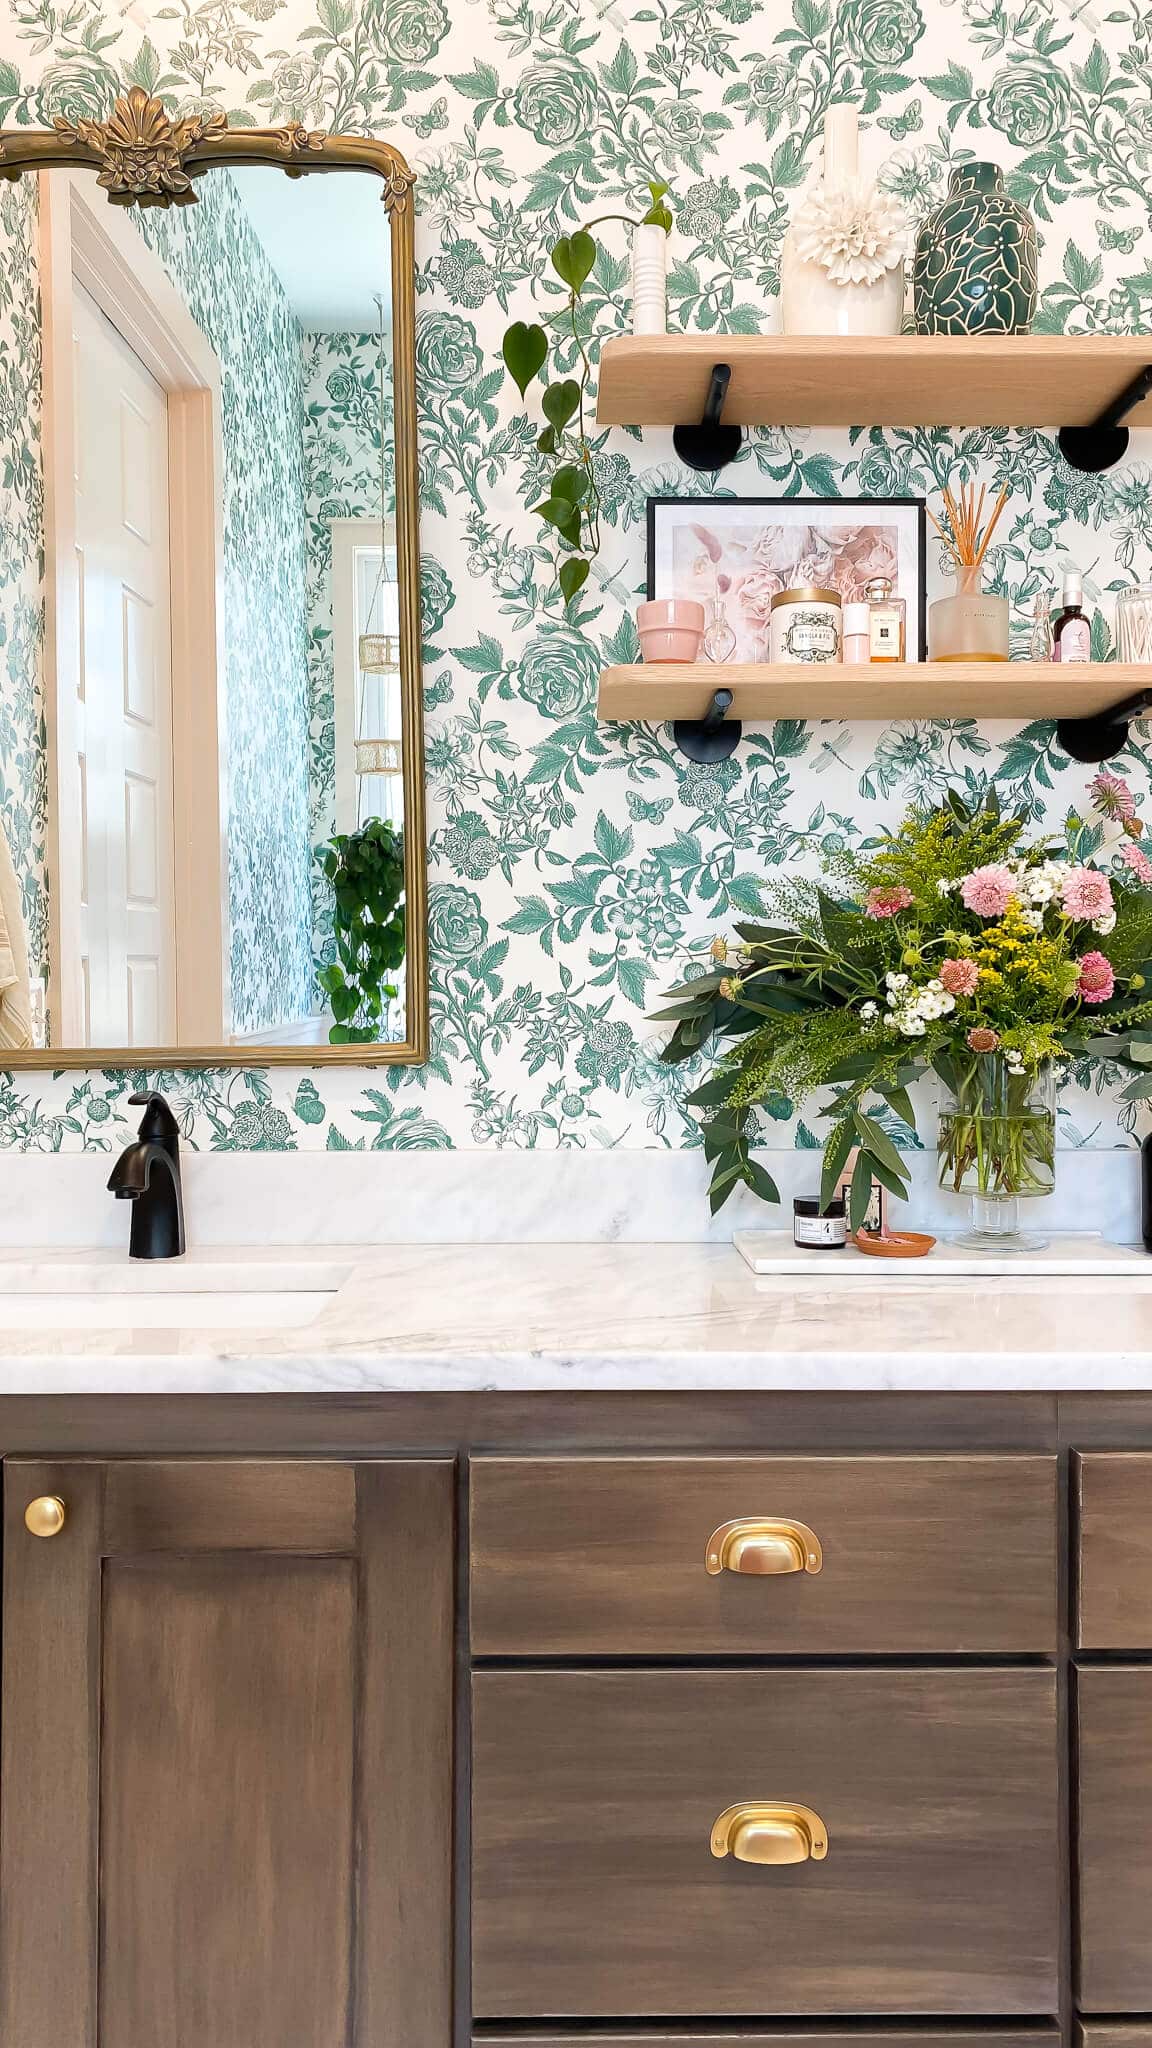
I’m obsessed with wallpaper. Like crazy obsessed – so anytime I can add wallpaper to a project, I will. Even though the wallpaper design was a little intricate, this part of the process was not only easier than I thought, but it was so satisfying!Install shelves – both in the shower and between the mirrors:
I wanted to add two shelves between the mirrors for a little additional storage (and styling) + add 3 marble shelves to the shower wall for neat storage of shower products.Update the pendant light glass cover, change out the mirrors, and update all the hardware:
The final touches really brought the design together. I swapped out the glass cover of the old pendant light for a simple, vintage style (this was also super budget-friendly).I changed the old mirrors which had a really wide frame (and were a style that I really disliked) for a couple of mirrors that felt more ornate.
Finally, all the hardware (cabinet pulls, hand towel + bath towel hooks) were replaced with simple but beautiful unlacquered brass ones that over time, would patina in the most droolworthy way.
TOOLS & SUPPLIES: my cottage-inspired bathroom
Never had I ever attempted a DIY of this size – so there were a number of tools that I had to buy AND teach myself how to use.
I hired a chipping hammer to help remove the floor tiles and purchased:
- a miter saw
- a table saw
- a tile saw
- a jigsaw
- a brad nail gun
- a load of hand tools I didn’t have
- all the appropriate safety equipment – hearing protection, eye protection, gloves… I used the one N95 masks I had on hand from prior to the pandemic until it broke and then couldn’t get my hands on anything else for months
Learning how to use these tools was much easier than I thought – they just feel really intimidating at first.
But I watched YouTube videos and binged content on Instagram from other incredibly inspiring women DIYing their spaces – like:
- Jennifer from Making Pretty Spaces,
- Angela from Angela Rose Home,
- Lauren Elizabeth Burke,
- Lindsay from Frills & Drills,
- Molly from The Honest Home,
- and Christine from Honey Built Home
Each of these talented women made me feel empowered to not only take on a project like this (sure, being a professional interior designer definitely helped me) but to feel more comfortable using tools that I previously felt were super scary.
Disclaimer: if you’ve never used some of these tools, make sure you understand all the safety requiments first and before turning the machine on, walk through exactly what you’re going to do… kinda like a dress rehearsal.

In case you would like to create your own Cottage Inspired Bathroom, here are the links:
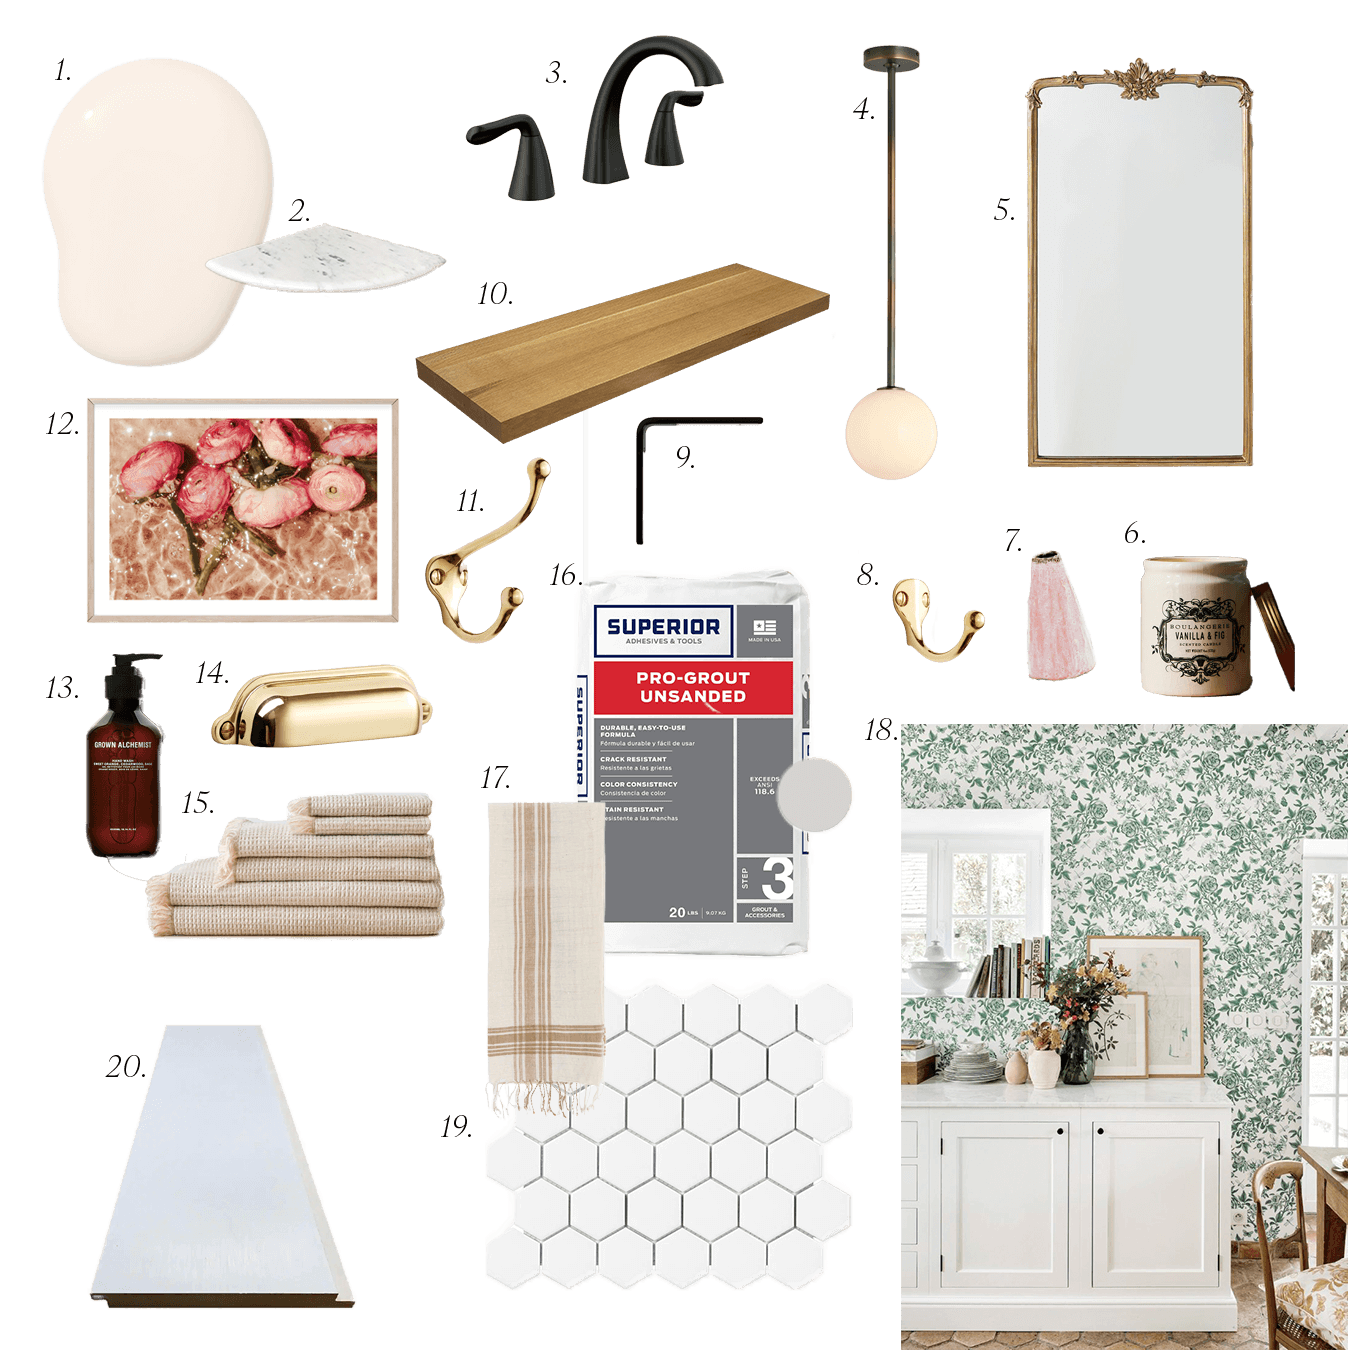
1. Pale Blush Pink Trim Paint 2. Carrara Marble Corner Shelf 3. Matte Black Bathroom Sink Faucet 4. Pendant Light 5. Ornate Mirror 6. Vanilla Fig Candle 7. Pink Posie Vase 8. Hand-towel Hook 9. Matte Black Shelf Brackets 10. White Oak Shelf 11. Bath Towel Hook 12. Floral Photographic Print 13. Herbal Hand Soap 14. Cabinet Drawer Pull. 15. Sand Bath Sheet 16. Unsanded Light Grey Grout 17. Beige Striped Hand-towel 18. Green Floral Wallpaper (similar) 19. 2″ Matte White Hexagon Tile 20. 6″ Wide Shiplap
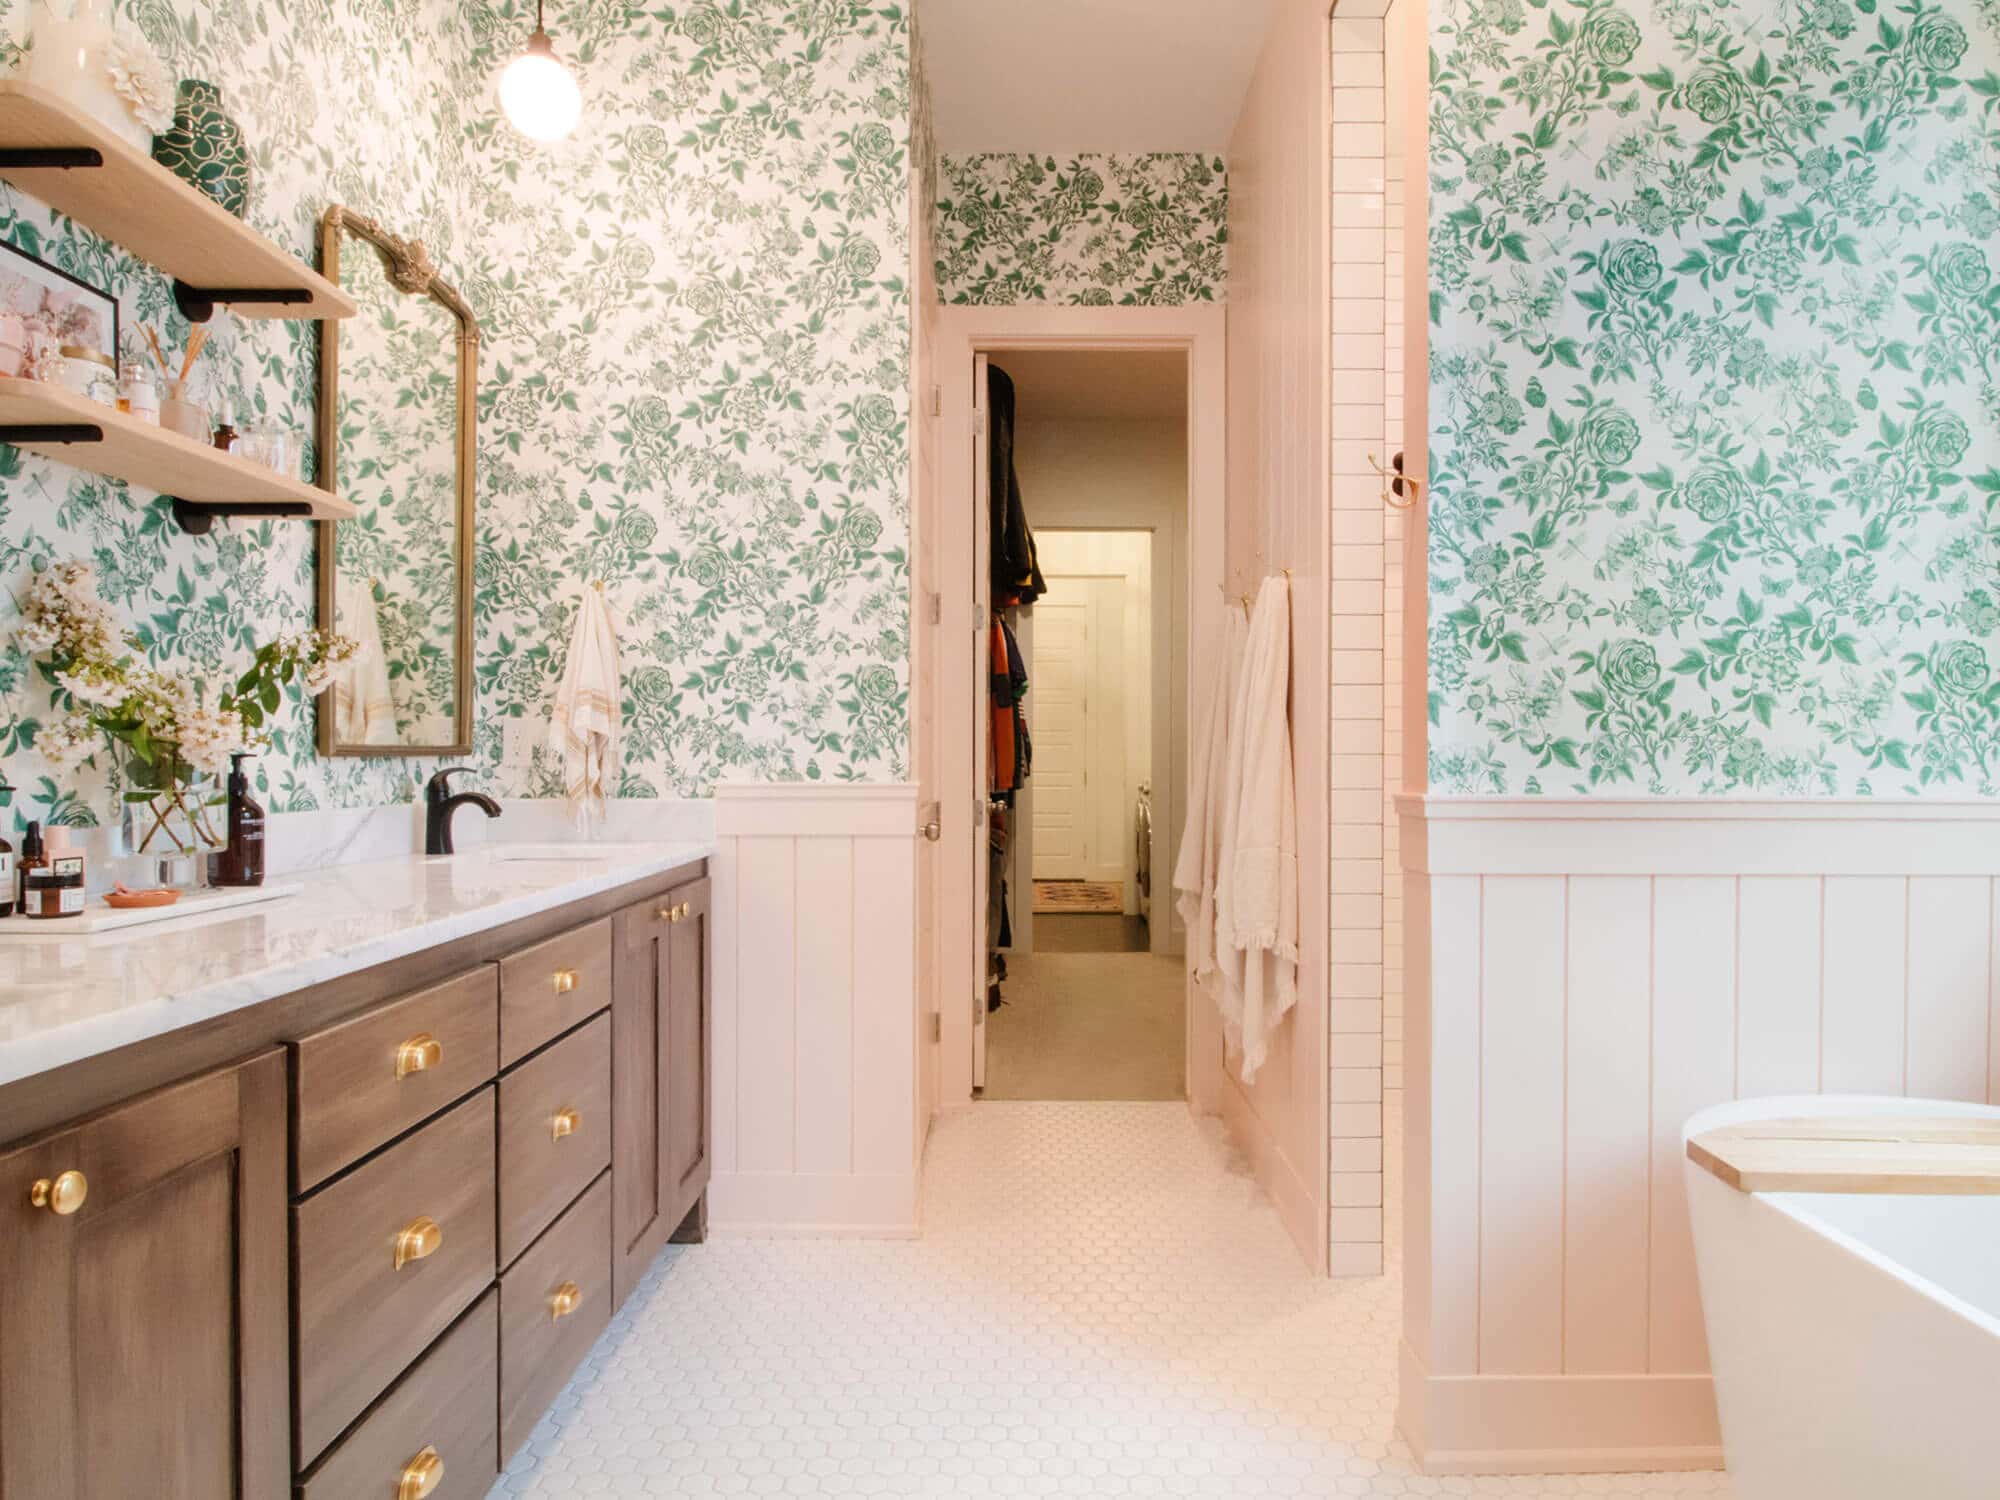
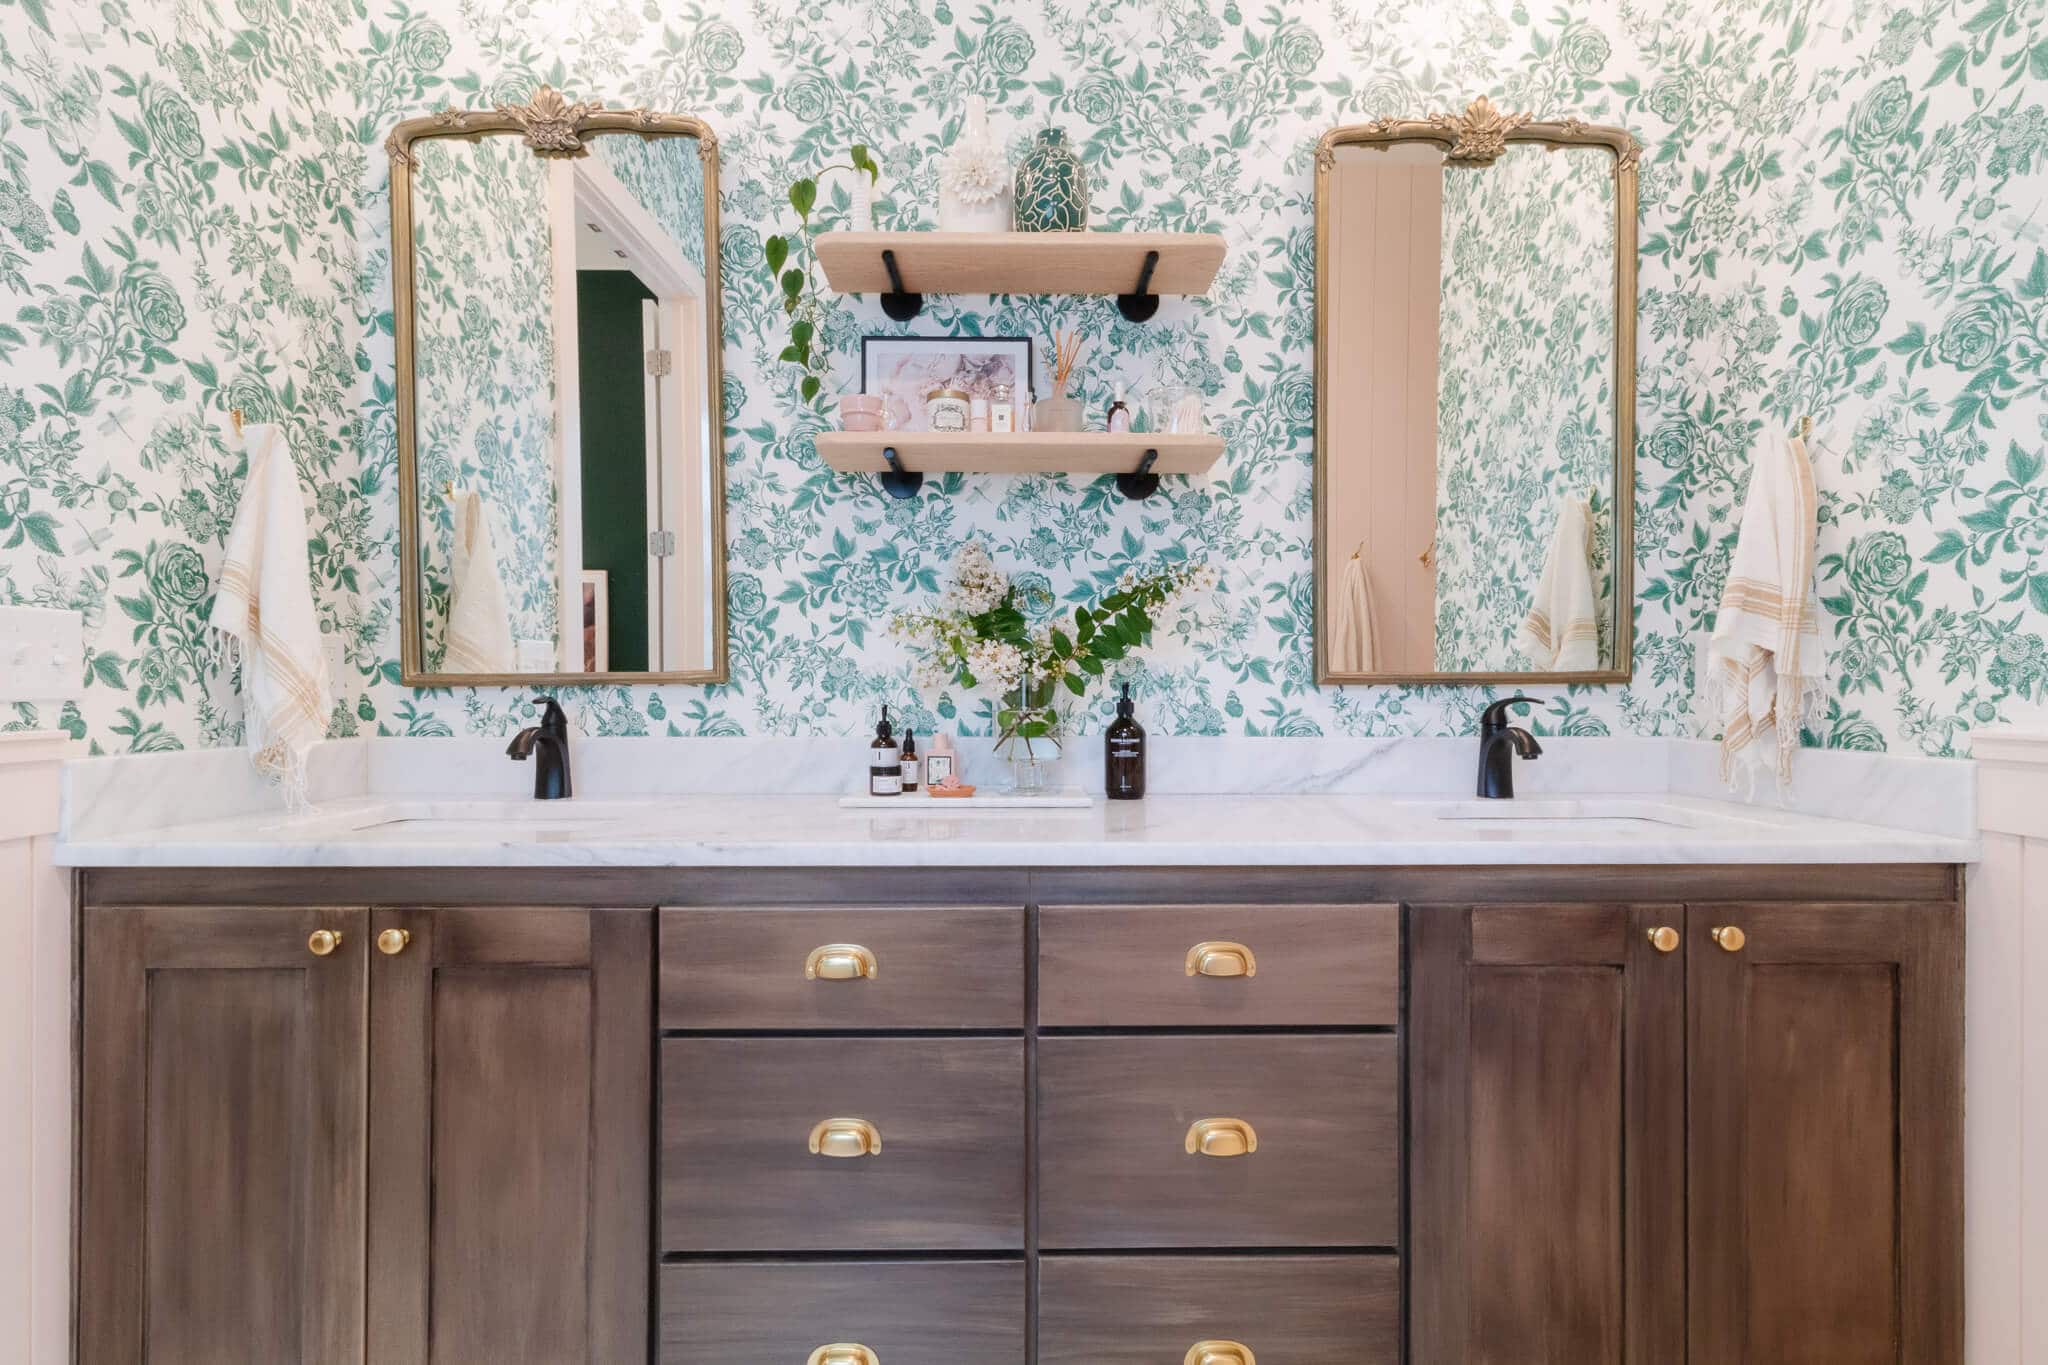
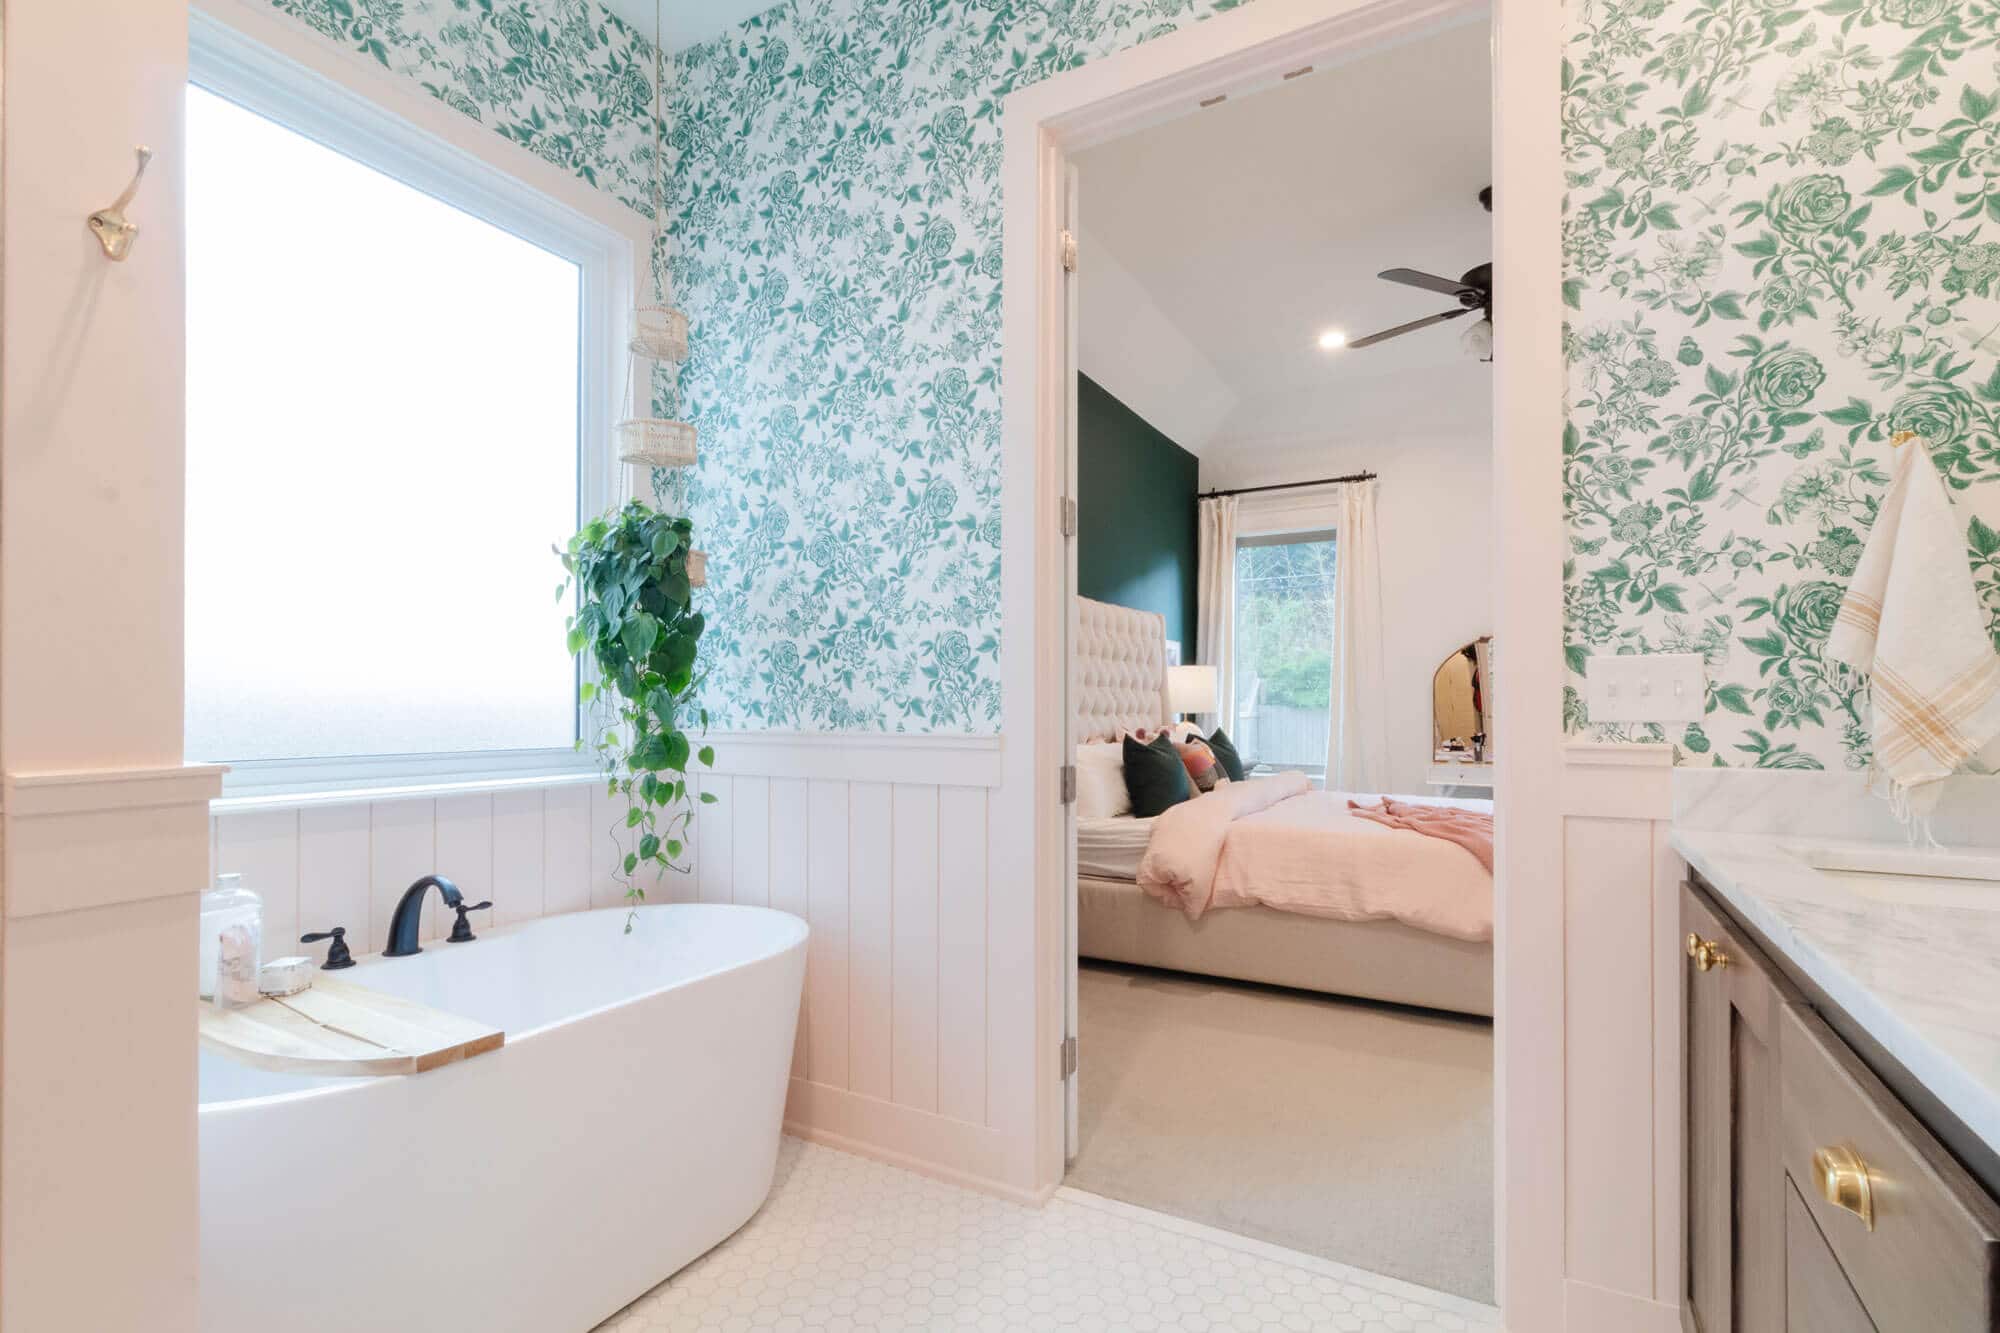
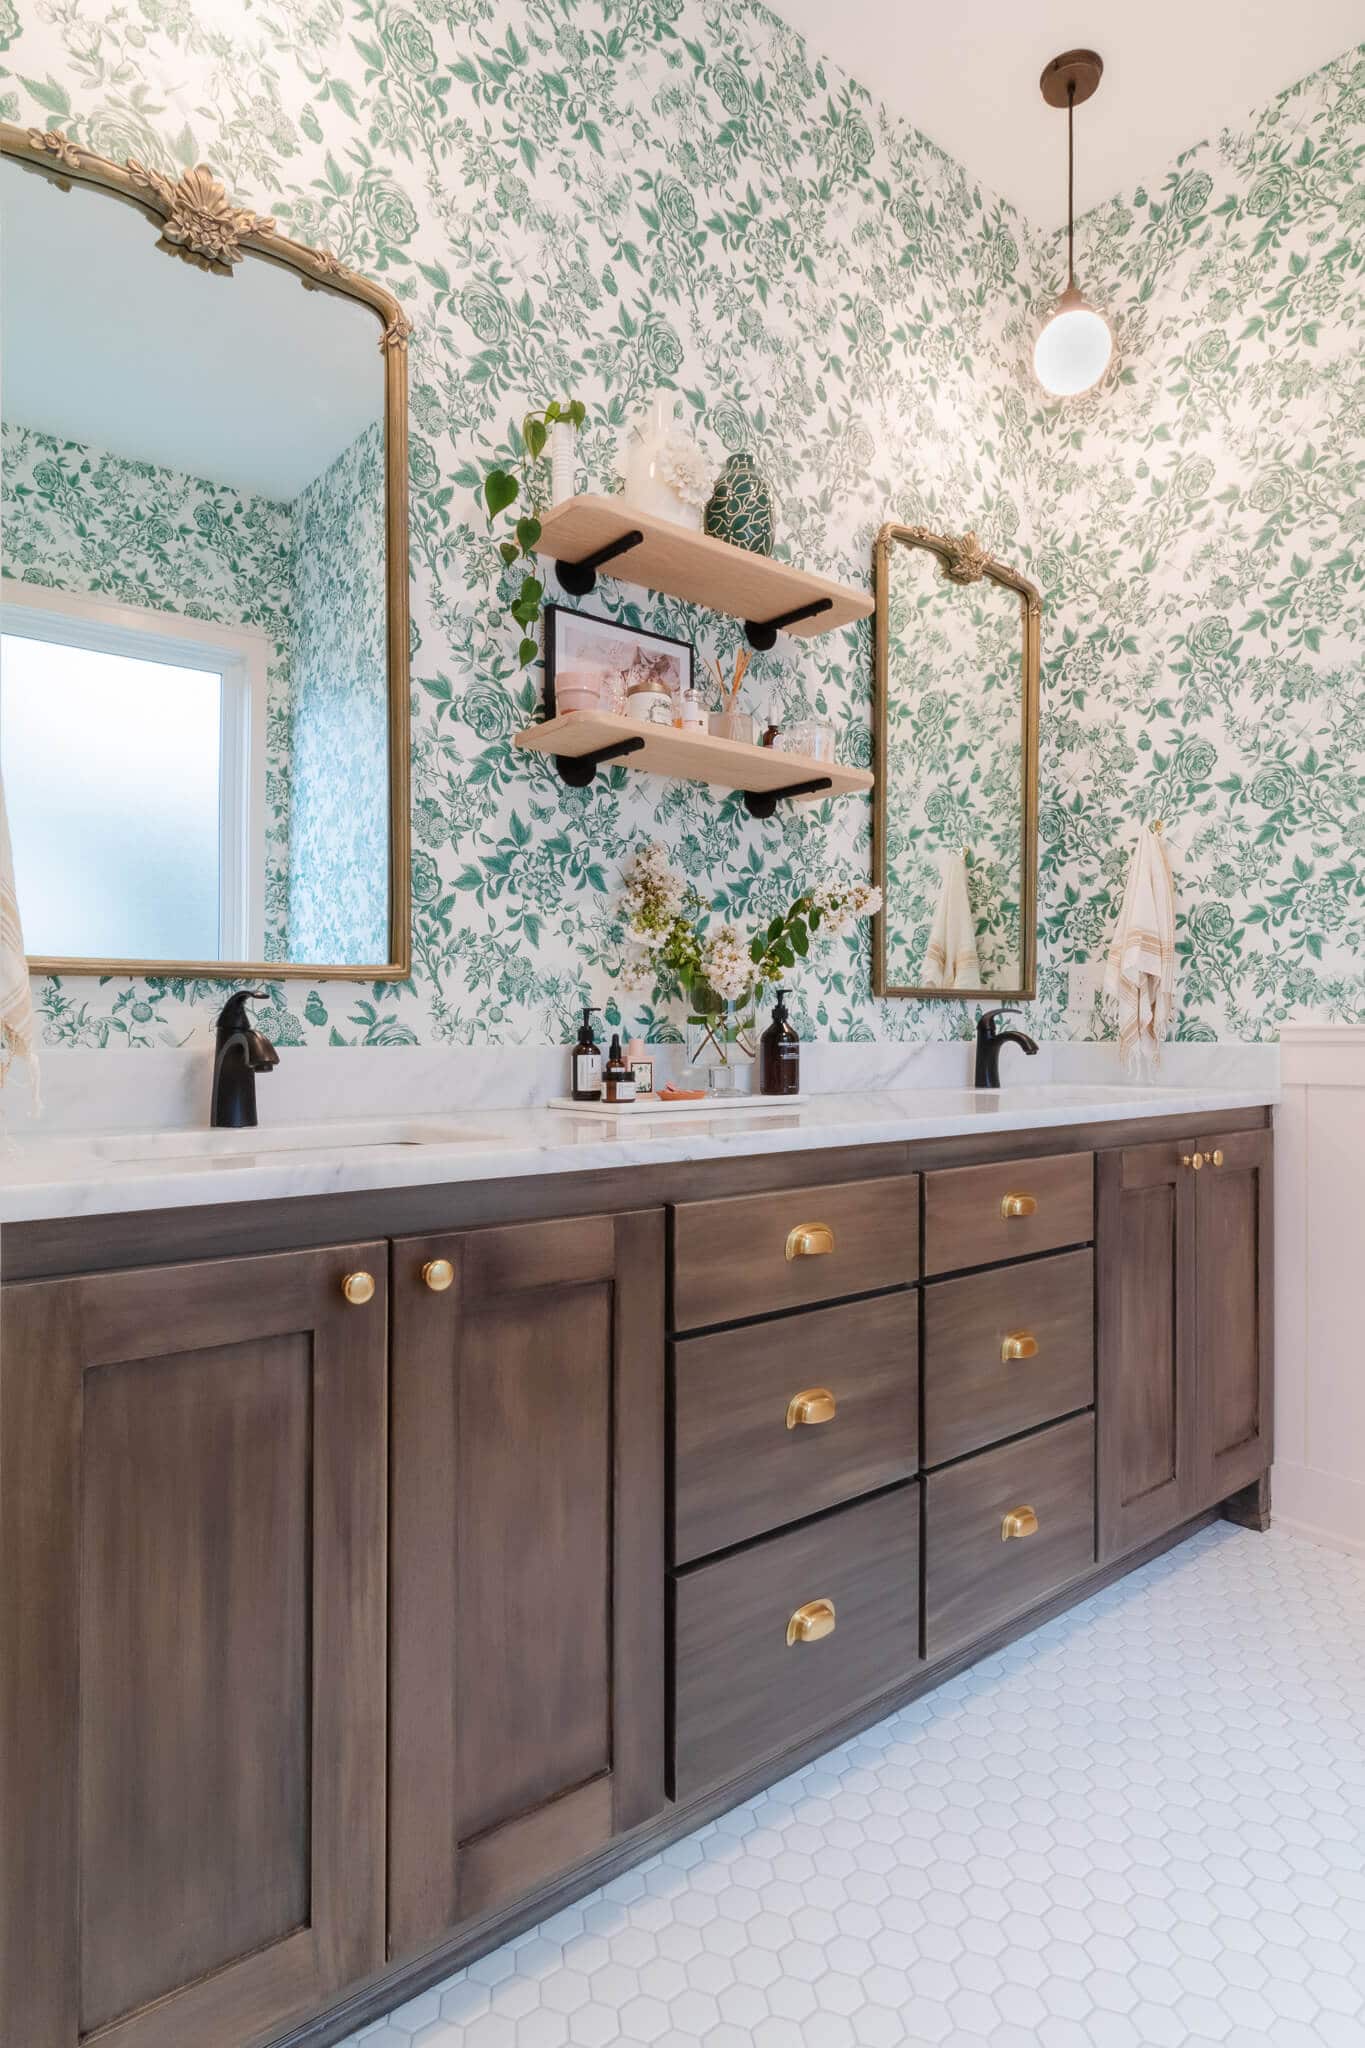
AFTER: my cottage-inspired bathroom
Here’s how she turned out! I’m obsessed and super sad that I only got to enjoy the finished space for a couple of months before the home was sold.
Would I do it again?
In a heartbeat… now that I’m recovered! Lol I’m not one to ever shy away from a challenge – and there were plenty of challenges during this project.
Things didn’t always go as planned (omg, it took me way longer than I thought – my work schedule went absolutely bananas… you can read about that here) and there were plenty of times that I had to problem-solve or completely pivot.
But seriously, I’m so proud of myself!
And the biggest bonus aside from having a gorgeous bathroom was the feedback – the last thing I wanted was for the space to look like a DIY job… you know what I’m talking about! Lol!
The three selling agents interviewed for the listing were all blown away when I said that I had done the renovation myself.
The plumber that came back to reinstall the tub and toilet was in awe – he said “it looks like something out of the pages of House Beautiful Magazine!”
I’ll take it!! Lol.
BEFORE
AFTER
DO YOU HAVE A SPACE that you would like to renovate or re-sparkle?
Email your project details to shelley@shelleyelizabethdesigns.com and we’ll talk about how we could make the perfect design collaboration partners.